Introduction
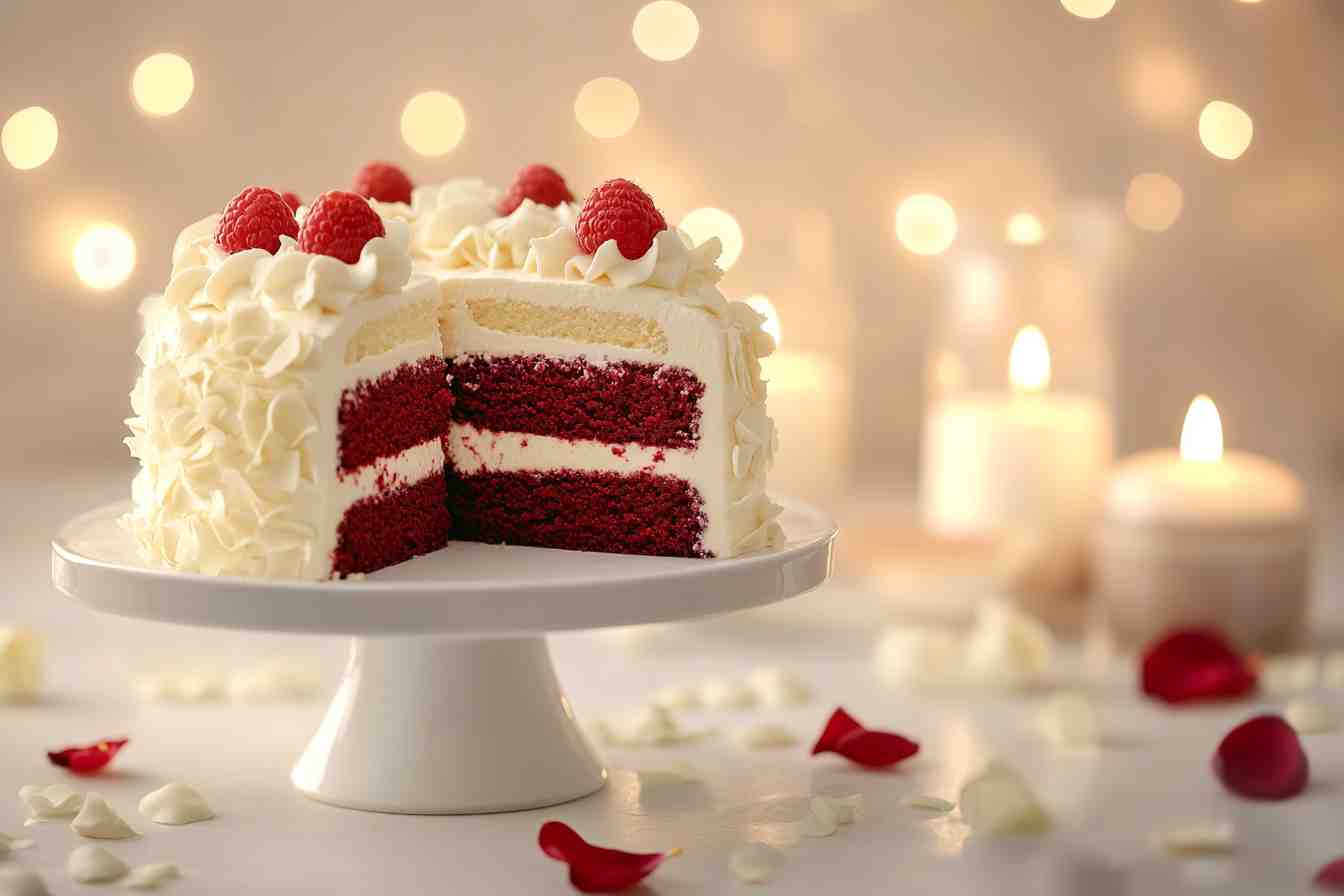
There’s something truly special about Red Velvet Love Cake—its rich red hue, velvety texture, and irresistible cream cheese frosting make it the ultimate romantic dessert. Whether you’re baking for Valentine’s Day, an anniversary, or simply to surprise a loved one, this cake is sure to impress.
Unlike traditional red velvet cake, the Love Cake version is even more decadent, often featuring layers of luscious cream cheese filling or a surprise ganache drizzle. With just the right balance of cocoa, vanilla, and tangy buttermilk, it’s moist, flavorful, and visually stunning.
In this guide, you’ll learn how to make a perfect Red Velvet Love Cake in just five simple steps—with expert tips for the fluffiest texture and richest taste.
💬 Are you ready to create the ultimate love-filled dessert? Let’s get baking!
What is Red Velvet Love Cake?
Red velvet cake has been a beloved classic for decades, but Red Velvet Love Cake takes this indulgence to the next level. With its signature deep red color, soft crumb, and tangy-sweet flavor, this cake is more than just a dessert—it’s a statement of love.
A Brief History of Red Velvet Cake
The origins of red velvet cake trace back to the early 1900s when bakers began adding cocoa powder to cakes for a smoother texture. During World War II, when food coloring was scarce, bakers used beet juice to enhance the red hue. Today, modern recipes rely on red food coloring to achieve that iconic look.
What Makes a “Love Cake” Different?
While traditional red velvet cake is already decadent, the Love Cake variation features extra indulgence, often with:
❤️ A creamy surprise layer—like ricotta or cream cheese baked into the batter.
❤️ More moisture and richness from added buttermilk and oil.
❤️ Romantic decorations like heart-shaped designs, white chocolate shavings, or fresh berries.
This cake is perfect for Valentine’s Day, anniversaries, weddings, or any time you want to bake with love!
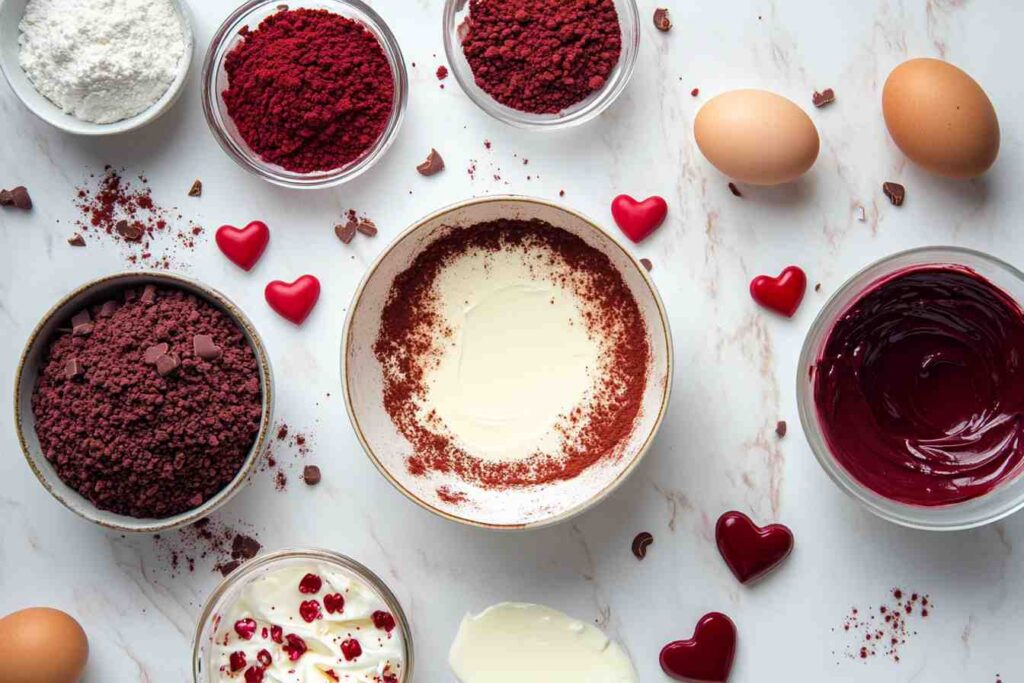
Ingredients You’ll Need
To make the perfect Red Velvet Love Cake, you’ll need a combination of classic baking staples and a few key ingredients that give this cake its signature flavor and texture.
🔹 Cake Ingredients
- 2 ½ cups all-purpose flour – Provides structure and softness.
- 1 ¾ cups granulated sugar – Adds sweetness and enhances moisture.
- 1 teaspoon baking soda – Helps the cake rise and stay fluffy.
- 1 teaspoon salt – Balances the flavors.
- 1 teaspoon cocoa powder – Adds a subtle chocolatey depth.
- 1 cup buttermilk – Keeps the cake ultra-moist and adds a slight tang.
- 1 cup vegetable oil – Ensures a soft, tender crumb.
- 2 large eggs – Helps bind the ingredients and create a smooth batter.
- 1 teaspoon vanilla extract – Enhances the overall flavor.
- 1 teaspoon white vinegar – Reacts with the baking soda for a lighter cake.
- 2 tablespoons red food coloring – Gives the cake its signature red hue.
🔹 Cream Cheese Frosting Ingredients
- 8 oz cream cheese (softened) – The key to a luscious, tangy frosting.
- ½ cup unsalted butter (softened) – Adds richness and smooth texture.
- 2 cups powdered sugar – Sweetens and thickens the frosting.
- 1 teaspoon vanilla extract – Enhances the flavor.
🔹 Optional Toppings & Decorations
- White chocolate shavings 🍫
- Fresh raspberries or strawberries 🍓
- Heart-shaped sprinkles ❤️
🌟 Ingredient Substitutions & Variations
✔ No buttermilk? Use 1 cup milk + 1 tablespoon vinegar as a substitute.
✔ Want a natural red hue? Swap food coloring for beet juice or pomegranate powder.
✔ Gluten-free version? Use a 1:1 gluten-free flour blend instead of all-purpose flour.
Step-by-Step Instructions
Follow these five simple steps to create the perfect Red Velvet Love Cake with a moist crumb and creamy frosting.
🔹 Step 1: Prepare Your Baking Tools
✔ Preheat your oven to 350°F (175°C).
✔ Grease and flour two 9-inch round cake pans or line them with parchment paper.
🔹 Step 2: Mix the Dry Ingredients
✔ In a large bowl, whisk together:
- Flour
- Sugar
- Baking soda
- Salt
- Cocoa powder
✔ Set this dry mixture aside.
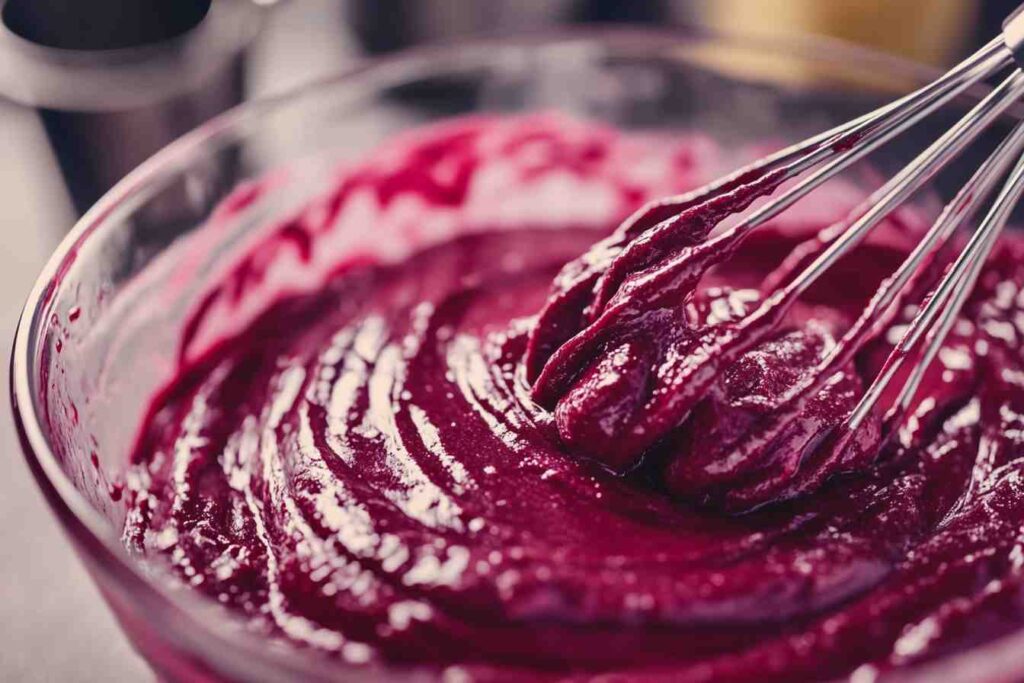
🔹 Step 3: Combine Wet Ingredients
✔ In another bowl, whisk together:
- Buttermilk
- Vegetable oil
- Eggs
- Vanilla extract
- White vinegar
- Red food coloring
✔ Slowly mix the wet ingredients into the dry ingredients, stirring gently until fully combined.
🔹 Step 4: Bake the Cake Layers
✔ Evenly divide the batter between the two cake pans.
✔ Bake for 30-35 minutes or until a toothpick inserted in the center comes out clean.
✔ Let the cakes cool in the pans for 10 minutes, then transfer them to a wire rack.
🔹 Step 5: Make the Cream Cheese Frosting & Assemble
✔ Beat the softened cream cheese and butter together until smooth.
✔ Gradually add powdered sugar and vanilla extract, mixing until fluffy.
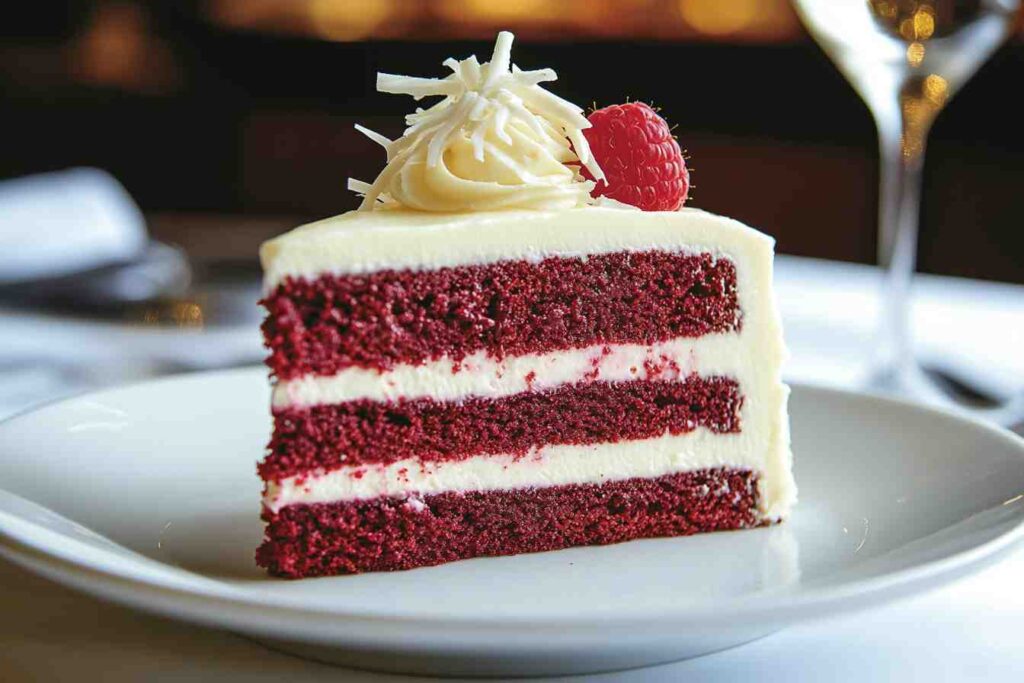
✔ Place one cake layer on a plate, spread a generous layer of frosting, then top with the second layer.
✔ Frost the top and sides evenly.
✔ Decorate with white chocolate shavings, fresh berries, or heart-shaped sprinkles!
💡 Pro Tip: For the best texture, chill the cake for 30 minutes before slicing.
Tips & Variations
Want to make your Red Velvet Love Cake even more special? Here are some expert tips and creative variations to personalize your cake!
🔹 Pro Tips for the Perfect Cake
✔ Measure your flour correctly – Spoon it into the measuring cup and level it off (don’t scoop directly).
✔ Don’t overmix the batter – Stir just until combined for a light and fluffy texture.
✔ Use gel food coloring – It gives a more vibrant red hue without altering the consistency.
✔ Chill the cake before frosting – This prevents crumbs from mixing into the frosting.
🔹 Fun Variations
❤️ Heart-Shaped Red Velvet Love Cake
Want to make your Red Velvet Love Cake even more romantic? Try baking it in a heart-shaped pan for a stunning presentation.
🎂 Need help shaping your cake perfectly? Check out our Complete Step-by-Step Guide to Making the Perfect Heart Cake for pro tips and techniques!
❤️ Extra Chocolatey Version
- Add ¼ cup of melted dark chocolate to the batter for a richer, fudgier texture.
- Sprinkle mini chocolate chips between the cake layers.
🌱 Gluten-Free Option
- Swap all-purpose flour for a 1:1 gluten-free flour blend.
- Add ½ teaspoon xanthan gum if your flour blend doesn’t contain it.
🥥 Dairy-Free & Vegan Version
- Use almond or soy milk + 1 tbsp vinegar instead of buttermilk.
- Replace eggs with flax eggs (1 tbsp flaxseed meal + 3 tbsp water per egg).
- Use vegan butter and dairy-free cream cheese for the frosting.
🎂 Mini Love Cakes
- Bake the batter in cupcake tins for adorable mini Red Velvet Love Cakes!
- Frost each cupcake with a swirl of cream cheese frosting and top with a chocolate-covered strawberry.
FAQs About Red Velvet Love Cake
Here are some frequently asked questions about Red Velvet Love Cake, along with expert answers to help you bake the perfect dessert.
1. How do I keep my Red Velvet Love Cake moist?
✔ Use buttermilk and oil instead of butter to retain moisture.
✔ Don’t overbake—check for doneness with a toothpick at 30 minutes.
✔ Store the cake properly covered to prevent it from drying out.
2. Can I make this cake ahead of time?
✔ Yes! Bake the cake layers 1-2 days in advance and wrap them in plastic wrap.
✔ Frost the cake on the day you plan to serve for the freshest taste.
3. What’s the best way to store leftovers?
✔ Keep leftovers in an airtight container in the refrigerator for up to 5 days.
✔ Bring to room temperature before serving for the best flavor.
4. Can I use natural food coloring instead of artificial?
✔ Absolutely! Use beet juice, pomegranate powder, or hibiscus powder for a natural red hue.
5. Why does Red Velvet Cake have vinegar in it?
✔ Vinegar reacts with baking soda to create a lighter, fluffier texture.
✔ It also enhances the red color when combined with cocoa powder.
6. Can I freeze Red Velvet Love Cake?
✔ Yes! Freeze the unfrosted cake layers for up to 3 months.
✔ Wrap each layer tightly in plastic wrap and place in a freezer-safe bag.
7. Can I make this cake in a different shape?
✔ Yes! Bake it in a heart-shaped pan for an extra romantic touch.
✔ For a layered sheet cake, bake in a 9×13-inch pan and cut into layers.
8. What can I use instead of cream cheese frosting?
✔ Try whipped buttercream, white chocolate ganache, or mascarpone frosting for a twist.
Conclusion
Baking a Red Velvet Love Cake is more than just following a recipe—it’s an expression of love, warmth, and celebration. Whether it’s for Valentine’s Day, an anniversary, a birthday, or just a special treat, this cake is the perfect way to make any moment unforgettable.
With its moist crumb, rich cocoa flavor, and silky cream cheese frosting, this dessert brings elegance and indulgence to your table. Plus, with all the fun variations—from extra chocolatey layers to gluten-free or dairy-free adaptations—you can personalize it to match your taste.
💡 Final Pro Tips Before You Bake!
✔ Make it ahead – The flavors develop even better if you bake the cake a day in advance.
✔ Double the frosting – Love extra creamy layers? Increase the frosting recipe for an even richer bite.
✔ Pair with a drink – Enjoy your cake with a warm latte, a glass of red wine, or a rich hot chocolate for the ultimate experience.
💬 Have you tried this Red Velvet Love Cake recipe? Let us know in the comments! And if you loved it, don’t forget to pin it, share it 📲❤️